Did you know that 93% of online experiences begin with a search engine? (HubSpot)
You read that right. Ninety-three freaking percent.
Now that leads to the next question:
Are you taking advantage of that?
It’s important to publish optimized blog posts and articles so that you can run a greater chance of nabbing a slice of the 93%-pie.
Why use blog posts to rock at SEO? Because 72% of marketers say relevant content creation was their most effective SEO tactic (HubSpot).
So let’s be the smart ones who do what data tells us to, and then reap the rewards later.
In this post, I cover the basics of SEO for blogs, so you can start increasing the traffic to your site ASAP.

SEO for Blogs: The Critical To-Do's
Now, some of these may seem silly, some may seem “extra”, but I promise you that these are all suuuper important if you want your content to rank in Google and drive free traffic to your site.
#1. Write the post first, think about SEO second
This may seem stupid, but it’s one of the most important things I can tell you. Do not write a post with the Robots in mind. Humans should always come first in the eyes of your content strategy.
There are a few reasons for this.
- Writing for the Robots leads to really sub-par content quality. If you’re trying to use SEO guidelines or tips to “game the system” or something, your blog posts will suck pretty bad. And Google doesn’t like suck-y content. More importantly, Humans don’t like suck-y content.
- Google can tell and will therefore not rank the content well, which defeats the whole purpose.
- Humans can tell and you’ll lose their trust for it (and the trust of your audience is critical)
- Robots can’t buy your sh*t.
Instead of trying really hard to please the Robots and obsessing over that, write the content that your audience wants and needs, with Human likes in mind, and then go back in and make it Robot-friendly too. Humans first, Robots second.
So now let’s get into how to make your content Robot-friendly.
#2. Do keyword research to pick a primary keyword and related keywords
Going back to what I was talking about in #1, make sure you write the post your people need or want, and then add in the keywords to optimize it.
The primary keyword is going to be the main topic of the post, and the term you’re hoping to rank for (though keep in mind it might not play out that way!).
This one should definitely go somewhere in the headline, but don’t push it on making it exact. Make sure it reads naturally for Humans first and foremost.
The related keywords are exactly what they sound like, terms or phrases related to your topic that would make sense to be included somewhere in the post.
#3. Use related keywords and phrases in subheaders and throughout the text
So the primary keyword goes in the headline of the post (and will obviously come up naturally throughout the post as well).
The related keywords should get sprinkled through the subheaders and the rest of the text.
A lot of this will happen naturally just from writing epic, helpful, in-depth content, but it’s worth paying attention to.
The reason we do this is because over the years, Google has gotten super smart. Using these terms shows Google that your content is informative and in-depth, which is helpful for Humans, so Google will reward that, because their ultimate goal is to help searchers find the best content.
#4. Shorten the URL slug
It’s important to make sure your site’s URLs are SEO-friendly, which means short and includes your primary keyword. The “slug” is the part that comes after “.com/” or “.net/” or whatever your site's suffix is.
In WordPress, if you’re writing a post, the URL slug tends to default to the title of the blog post.
One handy way to shorten it for blog posts is to remove all the “and”s, “the”s, “a”s, and other super short words that don't contribute anything.
To edit the slug in WordPress, it’s right under the text box for the Headline.
Here's how you edit the URL slugs in Squarespace.
#5. Use header tags
It’s important to use header tags in your blog posts.
What are header tags?
Header tags are little tiny pieces of code that turn a piece of text into a header or subheader.
It’s important to not just use font size and boldness to make something a header, because though it may make something look like a header to a Human, it doesn’t make something a header in the eyes of a Robot.
Google bots use header tags to determine what your content is about, how in-depth and valuable it is, and what sub-topics you cover. If you don’t use header tags, you’re not telling the Robots what terms, themes, or topics are important in your content. That’s missing an important opportunity there.
Most word processors and content management systems (like WordPress) make assigning header tags super easy.
Just highlight the text that’s going to be a header or subheader, click the dropdown, and selecting what rank of header you want (like Header 1 or Header 2).
Header 1 should only be used once per page, and it’s usually automatically assigned to your headline, so don’t use that one in your blog posts.
All your main headers in the post should use Header 2, and any subheaders can be Header 3 or 4.
#6. Update the page title and snippet (aka. meta tags)
You know in search results on Google how the titles are big and blue, and then there’s a few lines of description text underneath?
You can customize these!
Why do you want to?
Because the page title (the big blue line) is a strong indicator to Robots what your page is about, and both the page title and the snippet (the descriptive text) are huge for convincing Humans to click through to your site.
And the higher your click through rate, the higher Google will rank you over time.
A page title is optimized at less than 60 characters (depending on width of the letters). If you stick to this rule, about 90% of your titles should display correctly, according to Moz research.
Put important keywords in the page title, and if it makes sense, close to the beginning. It’s also okay to modify the page title from the original headline. I do this sometimes if the post’s headline is too long and going to get cut off by Google.
Include your brand name after the post’s title, using “-” or “|” to separate them.
Snippets are optimized at around 130-160 characters.
For WordPress, I like to use the Yoast plugin to write these because it makes it super easy.
For Squarespace, it’s a bit more complicated. Here’s some instructions on how to edit the Page Title on Squarespace, and here’s how to edit the snippet on Squarespace (they call it a “page description”).
#7. Update the alt text and image titles
This is another place that Robots look to understand the topic and context of the page.
Alt text and image titles are bits of text attached to the images on your site, but that don’t usually display on the page.
I usually make the alt text and image title the same.
When you first upload the image, it keeps the file name as the image title, and has no alt text.
You don’t want Robots to see IMG_0249 as the image title because that does nothing to help it understand the context of the page.
When it’s relevant to the image and it makes sense, include a keyword in the image title and alt text.
Key phrase there is “when it’s relevant to the image”. Don’t stretch the truth and stick keywords in on an image that has little to do with the topic of your post.
If Google sees that you’re stuffing keywords into all the image titles and alt texts, it’ll think you’re over-optimizing and trying to game the system, and then it won’t rank the page well. So it’ll have the opposite effect of what you want to happen.
In WordPress, you can change this info in the Media section of your dashboard. You can also edit the info when you add it to the blog post.
Here’s how to update the alt text in Squarespace. For the image title, they make it pretty difficult, so the easiest way is to just make sure the file name is what you want for the image title before you upload it.
#8. Scale images properly
I once improved my page speed score for my whole website by 62% by properly scaling 2 images.
Yep. That actually happened.
So what do I mean by scaling?
Well, when you add an image to your site, it appears on the page a certain size, right? If the image file is unnecessarily big, it can slow down your page loading time (what we call pagespeed) by a lot.
And having a slow load time can really negatively impact your user’s experience as well as your SEO.
Just 2 extra seconds of load time can increase your bounce rate (people leaving your site right away) by 50%! And that hurts your SEO.
Check your site through GT Metrix. If any of your images need scaling, it will say “Serve scaled images” in blue. If you click on that, it will tell you which files need to be scaled and by how much.
In WordPress, it’s easy to get close enough by selecting the right size when you add the image to your post, rather than shrinking it by dragging the corner.
In my case, it was a header image and that wasn’t working for some reason, so I had to delete the image from my Media Library, adjust the size of the file on my computer, and then re-upload it to my site.
[bctt tweet=”Just 2 extra seconds of load time can increase your bounce rate (people leaving your site right away) by 50%! And that hurts your SEO.” username=”SEOandconquer”]
#9. Link to 2-3 related blog posts on your site
Within the text of the post, it's important to link to a couple of other posts on your site when it's relevant.
This does a couple of things.
It indicates to Google that you write about this topic often and contributes to Google's idea of what topic your site is all about.
It also helps keep people clicking around on your site. If you're writing a post about peach pie, and you link to a post about how to store peaches, a person might click through to the other post.
This helps lower your bounce rate, which is an important factor in SEO, and it also helps you build a relationship with the people reading more and more of your content.
BONUS! #10. Link out to relevant high authority sites in your niche
It's important to link out to related authority sites in your niche.
It helps Google figure out your page's topic, and that your content is high quality info.
Also, studies are showing that pages with outbound links tend to rank higher in Google results then pages with no outbound links. So let's follow the data!
Don't go crazy though. You don't want your blog posts to start looking like Wiki pages, because that will leak SEO juice and people will click away from your site more and more. Just a few outbound links will do, depending on how long your post is.
[bctt tweet=”Pages with outbound links tend to rank higher in Google results than pages with no outbound links. Don't go crazy though. You don't want your blog posts to start looking like Wiki pages.” username=”SEOandconquer”]
So there you have it. Ten simple tasks to do for each blog post to make it as SEOtastic as possible.
Most of these are super easy, like the image tags and page snippets.
With the keywords and incorporating them in the text, the more you do this, the better you’ll get at it until you’re in the habit of doing it while you write.
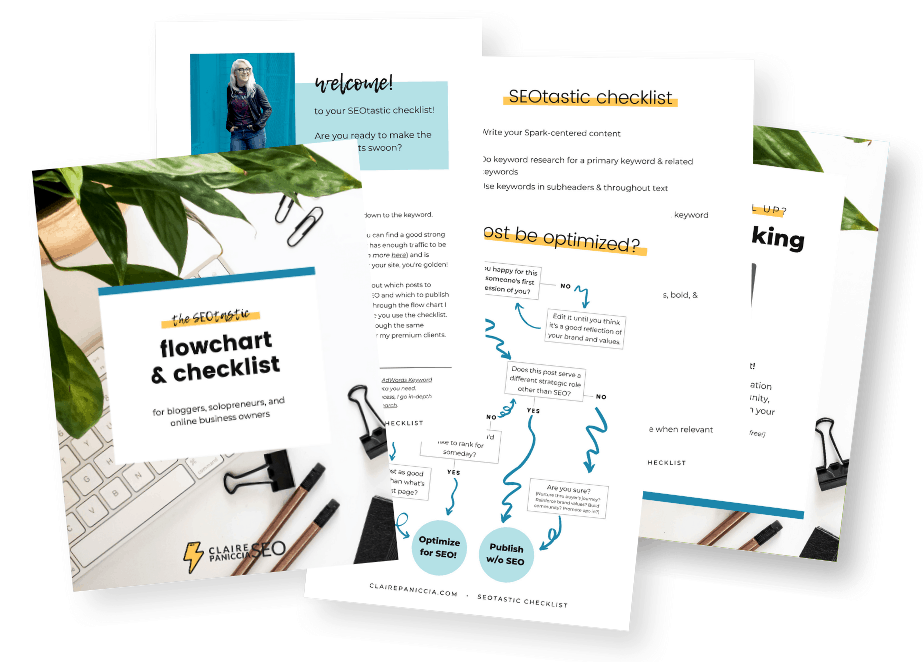
In order to make sure you never forget to do this for all your blog posts, I made you a handy dandy checklist – and it's free! Fill out the form below and then print it out and put it somewhere you’ll always see it when you write your posts.
Free SEOtastic Flowchart & Checklist
Awesome post! SEO is insanely important, and improving SEO is one of the biggest goals for my site this year. You have some great tips to help improve the SEO on my site. I’ll give these tips a try. Thanks!
thanks for the tips! do you have any thoughts / comments on using follow vs. no follow links on your site? i heard to use ‘no follow’ because then your juice doesn’t leak out to other websites, however, that defeats the purpose of #9 and #10 in your list! Your thoughts?
Generally you’ll want to use do-follow links. The most common use for no-follow links for bloggers is on affiliate links, as well as comments and on any sponsored content.
The idea that you’re “leaking” SEO juice just doesn’t hold. Linking out really will only hurt you if you’re linking to way too many pages (so that they look like Wiki pages) or if you’re linking to low quality pages.
I hope that helps!
This is so helpful! I have clients that post HUGE images on their blog and don’t understand why their site runs slowly and doesn’t rank! It’s all about the SEO!
Tiffany | http://TiffanyStaples.com
Thank you Claire. Some great immediately actionable tips here. Much appreciated! Keep the great work.
Very nice post! Thanks for providing great SEO tips for WordPress bloggers.
thanks for the great list It was a very useful blogs that u gave to us ! i really found what am looking for Keep updating more.
I’m so glad it’s helpful! I’ve got some more content coming in the next few weeks, so stay tuned!
The key is you need to spend time optimizing the contents of your website that are going to have the most positive impact on your traffic.
Absolutely. Making sure you’re focusing on the right posts is important. I actually did a case study last year of a client’s post that I re-vamped and optimized, and SEO traffic to that post exploded 5x! So I 100000% agree with you!
Awesome tips and step by step explanation on SEO FOR BLOGS. Really appreciate the way you have written and explained. Especially the Keyword Research Section.
In addition, you didn’t mention the blog length which is also a part of SEO for Blogs, what you think about that?
I am really gonna apply this for the future. Worth reading it.
Thanks for sharing it with us.
Good work..!!
Thank you! I’m so glad it was helpful!
You’re right, I should write something about post length. In general, the longer the better (at least for SEO purposes). I tend to recommend at least 2000 words.
Thanks for sharing such a good content which is related to SEO, I really enjoyed the insign you bring to the topic, awesome stuff!
I complete guide of how to write and work an article for the beginners. I must say you have covered all the important aspects of preparing an article. Thank you very much for this rich informative article.