Disclosure: Some of the links in this post are affiliate links. If you click on an affiliate link and make a purchase, I may receive a small commission at no extra cost to you. These are my opinions and are not representative of the companies that create these products. My reviews are based on my personal own experience and research.
No matter how long you’ve been at this whole online business thing, whether you just started last week or you’re in your seventh year of business, analytics is likely one of those things that you know you need, but you’re honestly not sure what to do with it or what it means, or even how to get started with Google Analytics and setting it up.

One time, I was doing a content audit for a blogger who’d been podcasting and blogging for 7 years. Loooots of content to go through. So, like I always do (especially when there’s that much content to sort through), I asked for access to his Google Analytics.
He chuckled and went “uuuhhh…”
“Wait… you do have Google Analytics set up, don’t you?”
Laughing, he said “I think we had it set up at some point, but when we updated our website a few years ago, the connection code-y thing got broken and I think it’s not connected anymore.”
Analytics. Oooooh analytics.
Tracking your analytics data from the start is super valuable.
Even if you’re not getting hardly any traffic to your site yet because it’s practically still fetal, setting up proper tracking now will give you lots of data to inform your decisions later.
But you can’t track jack-diddly if you can’t figure out how to get it rolling in the first place, so in this post, I’m going to show you how.
Why should you track analytics and traffic data for your site?
Unless you’re a big ol’ geek like me, parsing through the firehose of data that Google Analytics throws at you can be overwhelming.
If you’re just starting out, you’re not going to be relying too much on your stats yet. But it’s super important to get it set up now, so that later on, when you do need it so that you can analyze all that awesome traffic Future You will be getting, you’ll already have boatloads of data to analyze rather than starting from nothing.
Here’s just a handful of things you can learn from tracking your site’s analytics:
- It’ll let you know if a paid campaign is working or not, so you don’t have to guess and waste your money if it’s not.
- It’ll tell you more about your audience so that you can keep fine tuning your Ideal Customer profile and writing content more keenly targeted at them.
- It will tell you where your traffic is coming from so that you know which social media platforms are actually working for you.
- It will let you know which content is getting the most traffic, so you can write more stuff like that.
- It'll let you know what keywords are bringing you traffic, which is an important part of the keyword research process.
- And soooo much more!
How to create your Google Analytics Account
If you already have an account with Google (like if you use Gmail for your business email like I do), make sure you’re signed into that account already.
1. Go to google.com/analytics

2. Click “Start For Free”
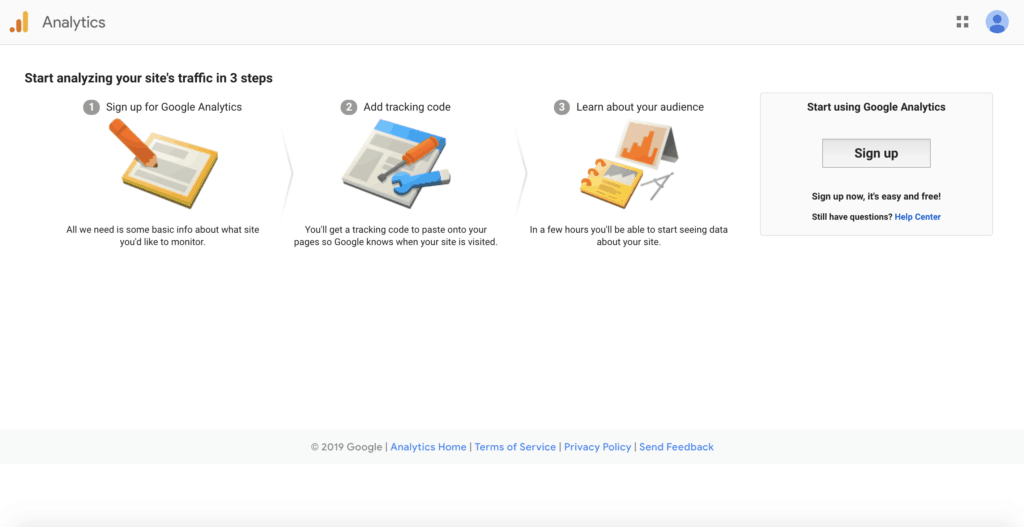
3. Click “Sign up” on the right
4. Then you'll set up your new account!
How to set up your Google Analytics Account Properly
It’s easy to make certain mistakes at this stage if you’ve never done this before, and this info can’t be changed later on, so let’s break down what each of these fields is asking for exactly.

If your business is one where you run multiple different sites, the Account Name field will be the name for the umbrella brand that they all fall under. Then each site will receive its own Property. On this page, you’re setting up the property for whichever site you want to do first. The name of that website will go in the field Website Name (and will inform all the rest of the info on this page)
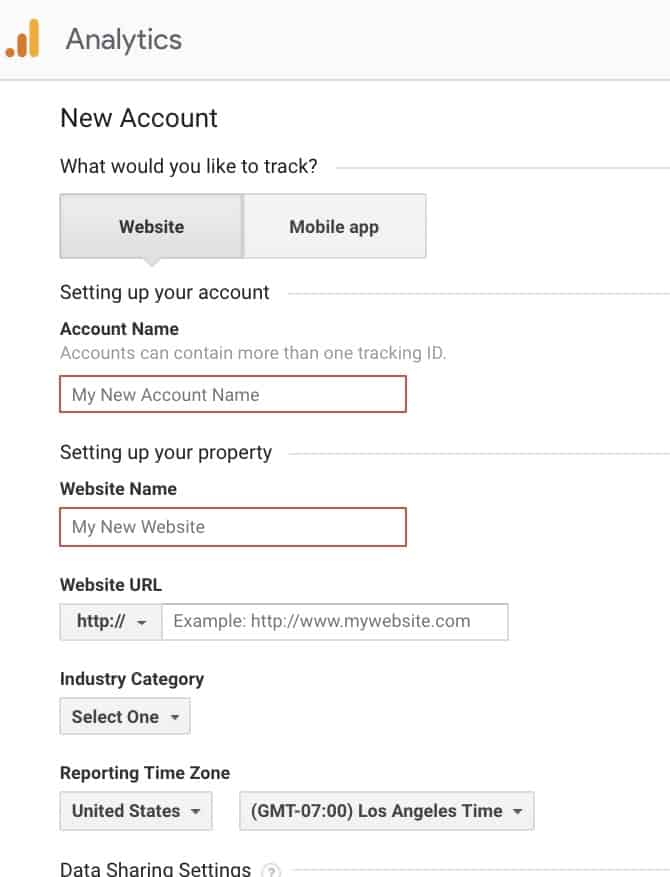
If you’ve only got one site or one brand, feel free to just use the same name for both Account Name and Website Name.
Hopefully, your website is SSL certified and has “https://” at the beginning as its default. Assuming that’s the case, select https under Website URL, and then enter your homepage (eg. for my site it’s www.clairepaniccia.com)
Select the closest Industry Category you can find.
And of course choose your time zone. It’s important to get this right because if you choose the wrong time zone, or forget to change it to the correct one, all of your reports will be off.
Data Sharing Settings
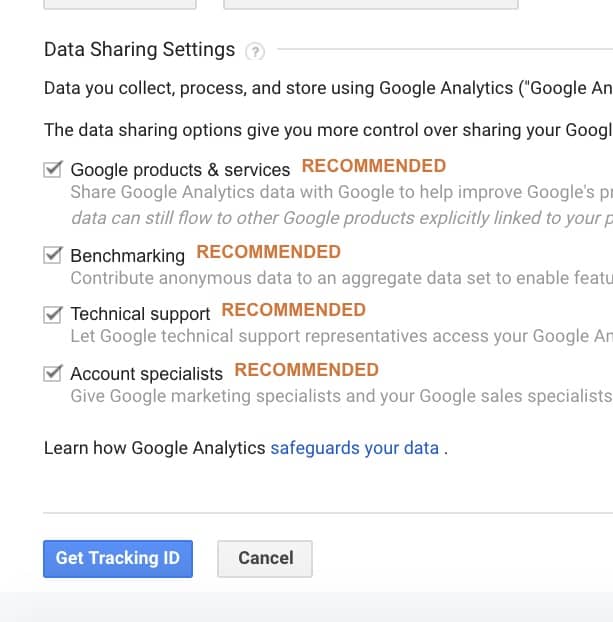
Google products & services: Definitely check this one. This allows the different tools that Google provides to talk to each other, like Google Search Console, Google AdWords, Google Tag Manager, etc. If you don’t check this box, you won’t be able to integrate any of them.
Benchmarking: Totally up to you. This is where you opt in to anonymously share your site data with other sites in your industry. You’ll never be compared one-to-one, so no one will be able to identify the data as specifically your site’s. It’s all anonymous. If you’re in a common industry or market, the Benchmarking reports are handy to compare your site to competitors’ in the industry, but for small solopreneurs it may or may not be helpful.
Technical support: Highly recommend this. You never know when zombie bots will invade the internet or the worst unimaginable stuff happens to your site or your account and you need tech support. If this isn’t checked, Google’s tech support will have absolutely no way to see your account or data and help you out.
Account specialists: Up to you. This is the same as the last one, but instead of tech support it’s “marketing specialists”. They won’t be able to give you advice on your account (even if it’s a dedicated sales specialist that you reached out to and asked for help).
Once you’ve filled everything out and checked/unchecked your selections, click Get Tracking ID.
^ Here’s a video I made for my SEO Foundations Guidebook that walks you through the process of creating a new property on Google Analytics, so you know exactly where to click and what to enter!
How to Install Google Analytics On Your WordPress Site
Then you’ll be syncing your “UA-” tracking code into your site.
The idea is that you want this code to be on every single page of your site that exists now or will ever exist in the future. So you want to make sure it gets injected into a global space on your site, somewhere that will exist everywhere. This will be the Header section of the code.
But don’t worry, it doesn’t have to be as complicated as it sounds.
There are a couple of ways I’ve found that make it super duper simple, all thanks to the magic of plugins.
Option 1: Insert Headers & Footers plugin
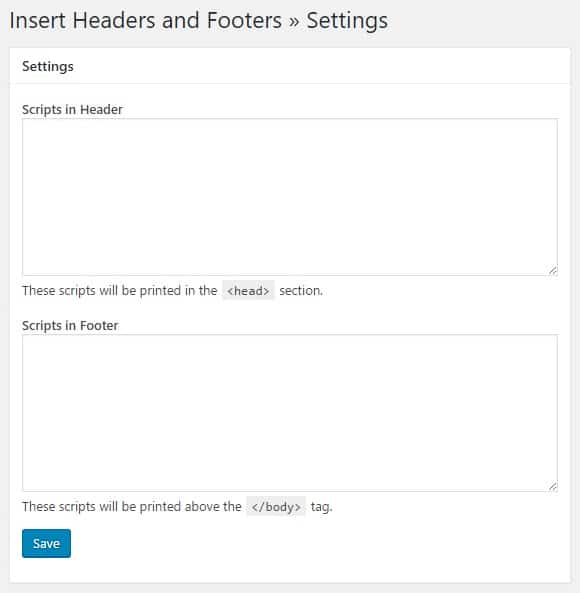
Insert Headers & Footers is a free plugin that lets you easily paste any code into the Header section of your site or the Footer section of your site.
After you’ve installed and activated the plugin, you can insert any tracking code you need in the Header section (like the Facebook Ads Pixel or the Rich Pins code)
For Google Analytics, just copy the Javascript code in the “Global Site Tag” section, go back to your WordPress site, go to the Insert Headers & Footers page (you’ll find it under the Settings menu), and paste it into the Scripts in Header box. Then click Save, and you’re donezo!
Option 2: MonsterInsights plugin

Monster Insights is a Google Analytics plugin that does a whole lot more than just house the tracking code. It can show you basic Analytics reports right in your WordPress, and with certain accounts you can even use it to track affiliate links, form conversions, event tracking, and tons more.
There is a Free Lite version and a Paid version. Personally, I have a Pro account, and love all its bells and whistles, but any level will do for syncing the tracking code.
Once the plugin is installed and activated, you won’t even need the Google Analytics Javascript code! All you need is the “UA-” tracking ID!
There are two ways to connect your Analytics account to your site through MonsterInsights.
Here is a video from MonsterInsights illustrating the way they suggest.
Personally I’ve had issues with that, so I prefer to do it manually (they call it “manually” but it’s really no harder). Here’s how to do that:
- Just copy the UA- tracking ID from your Google Analytics
- If you’ve already navigated away from the page with the code, here’s how you can find it again: Click Admin > Select the right ACCOUNT from the dropdown > select the right PROPERTY from the dropdown > Under Property, click Tracking Info, and then Tracking Code > Your tracking ID is at the top of the page! Copy this.
- Go back to the backend of your WordPress site,
- Navigate to Insights > Settings
- Underneath the big blue button to authenticate their way, there’s a blue link that says “Click here to authenticate manually”. Click that.
- A new field will appear, where you’ll paste the UA- tracking code that you just copied.
- And then Save! Easy peasy!
^ Here’s another video from my SEO Foundations Guidebook where I walk you through this whole process of authenticating your Google Analytics through MonsterInsights.
How to Install Google Analytics on Squarespace
Squarespace doesn’t use plugins like WordPress does, so they’ve got a built-in authentication process to make it easy for you.
1. Once you’re logged into your Squarespace backend, you’ll want to navigate to Settings > Advanced > External API Keys
2. Copy your UA- tracking ID from Google Analytics
- If you’ve already navigated away from the page with the code, here’s how you can find it again: Click Admin > Select the right ACCOUNT from the dropdown > select the right PROPERTY from the dropdown > Under Property, click Tracking Info, and then Tracking Code > Your tracking ID is at the top of the page! Copy this
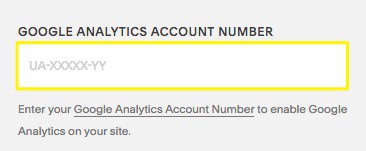
3. Then just paste it into the Google Analytics Account Number field.
4. Click Save and you're donezo!
Just so you know, according to Squarespace, it can take up to 24 hours for the connection to solidify and for data to start populating in Google Analytics, so don't freak out if you're not seeing data for a bit.
No matter if you’re using Squarespace or WordPress, if you just started or have been at it forever and never set up Analytics for whatever reason, now you have everything set up to start collecting data right away and make informed decisions about your content marketing based on more than just hunches and stabs in the dark.
If more in-depth, non-boring, step-by-step help with SEO details like this sounds like the highlight of your week, check out my ebook SEO Foundations for Non-Techies. It’s the perfect antidote to the feeling of wanting to throw your laptop out the window when trying to SEO your site.
I'm curious: how do you feel about analytics? Love it or terrified of it? Let me know in the comments!
Key soft to understand clients behaviour. Together with heatmaps – very nice tools.
It’s worth also to track events and click inside service. GA is a key also to connect
website with other analytics software. Nice article!